Intoduction
The RGB LED is easy to be integrated into useful Arduino Uno projects That’s why I propose the Article: Easy RGB LED Arduino Uno project.
RGB
The RGB color standard is an additive color model in which red, green and blue light are counted together in various ways to reproduce a broad array of colors.
The model’s name comes from the initials of the three additive primary colors, red, green, and blue. In digital photography, the RGB color space is a color space used by most digital cameras.
It consists of 72% of the total number of colors expressed by red, green, and blue light combinations. A device has RGB capabilities if it has at least one set of three or more monochromatic lights capable of additively.

RGB code couleur
RGB code couleur is a code that is used to represent the colors in the RGB color model. It was developed to simplify color specifications for computer programs and applications.
The first version of the RGB code couleur, which was released in 1963, contained only two colors: red and blue.
Uses of RGB colors
RGB LEDs are a type of LED that can produce any color in the visible spectrum.There are many uses for RGB LEDs. For example, they provide light in various applications, from traffic lights to home lamps. They can also be used in projectors and TVs.
The color of an RGB LED is determined by controlling the intensity of three distinct colors: red, green, and blue. The intensity of each color is adjusted as needed to produce the desired color.
RGB LED Arduino Uno project
In this section, we will make an RGB LED Arduino Uno project to receive from this RGB LED any color we need.
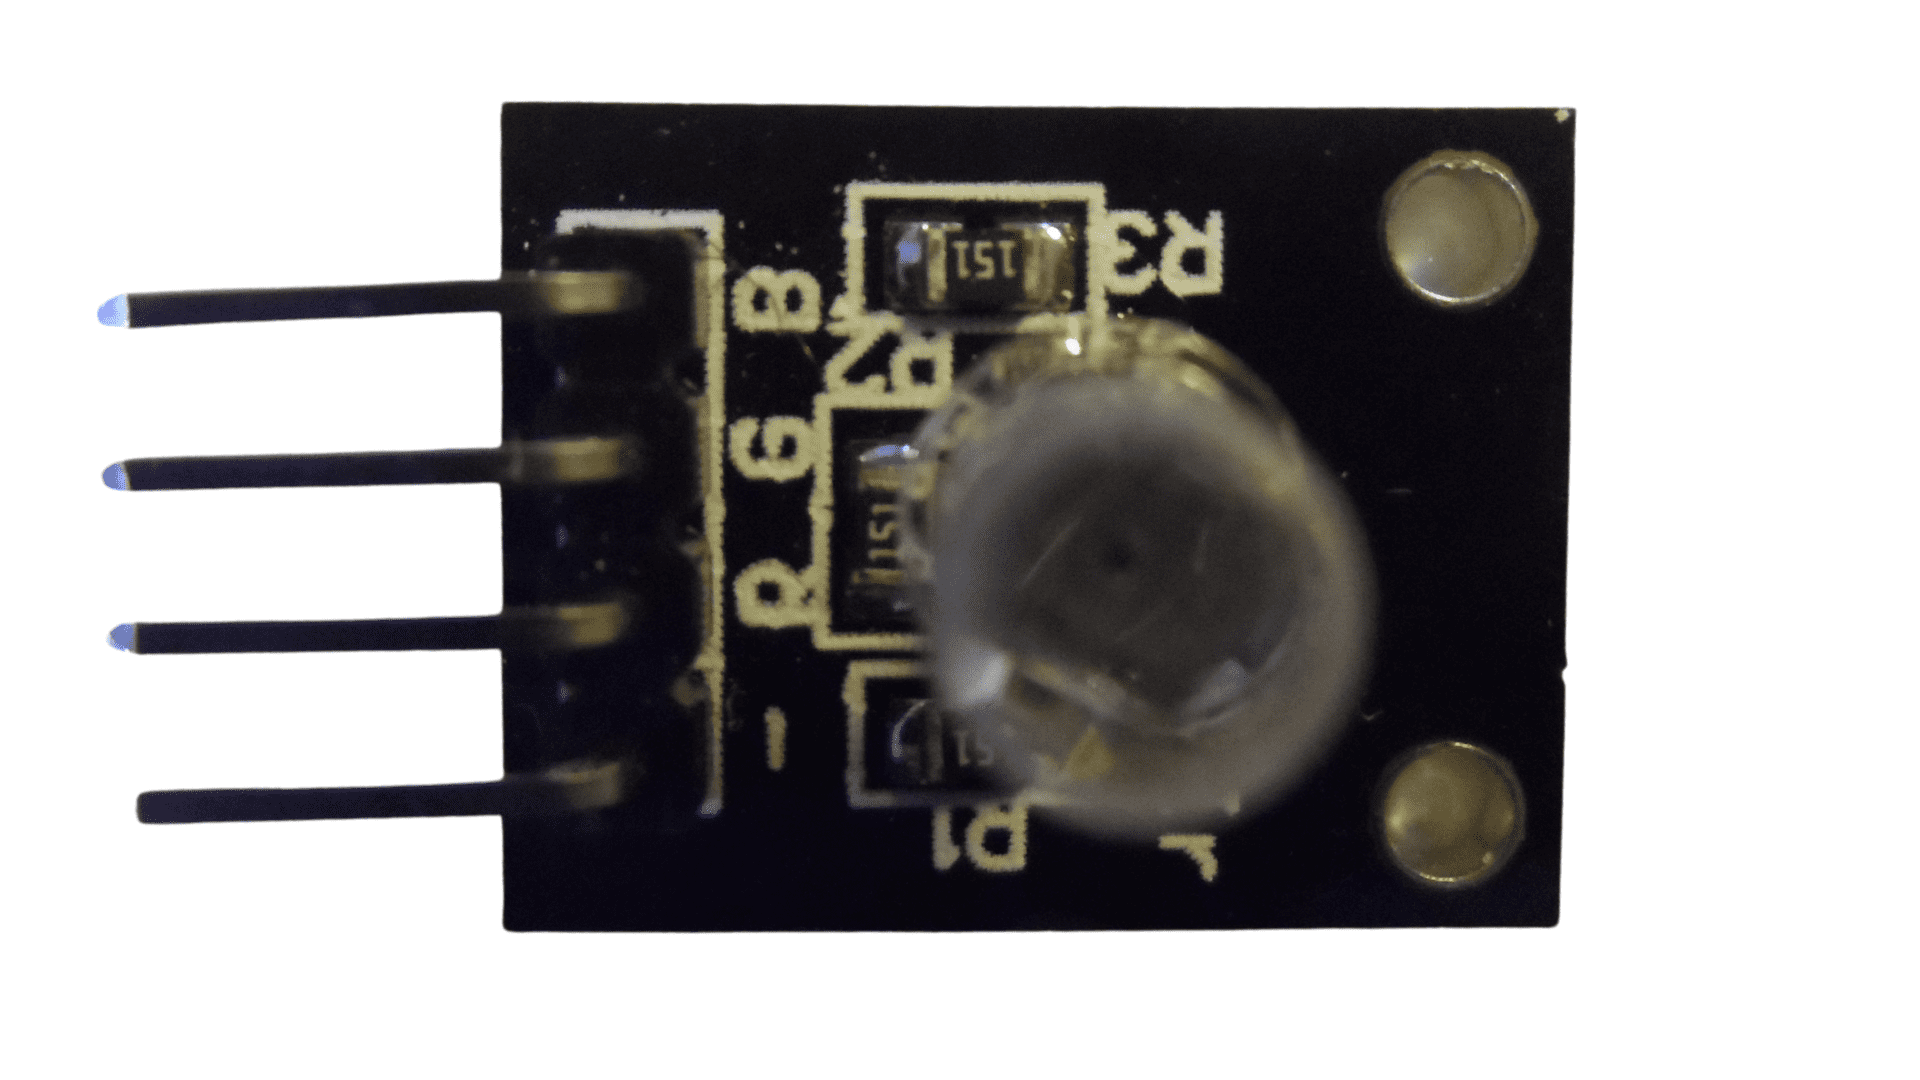
Description of the RGB LED
RGB LED is a light-emitting diode (LED) that emits red, green, and blue light. It is used in many applications such as display screens, TV sets, lighting systems, traffic lights and so on.
There are three legs related to the RGB LED. The first leg is the R leg; the second leg is the G leg; the third is the B leg the fourth is the ground leg.

The component needed for the RGB LED Arduino Uno project.
- Arduino Uno board
- A breadboard
- RGB LED
- Three 220 ohm Resistors to protect the LED in the RGB LED
- Three jumper wires
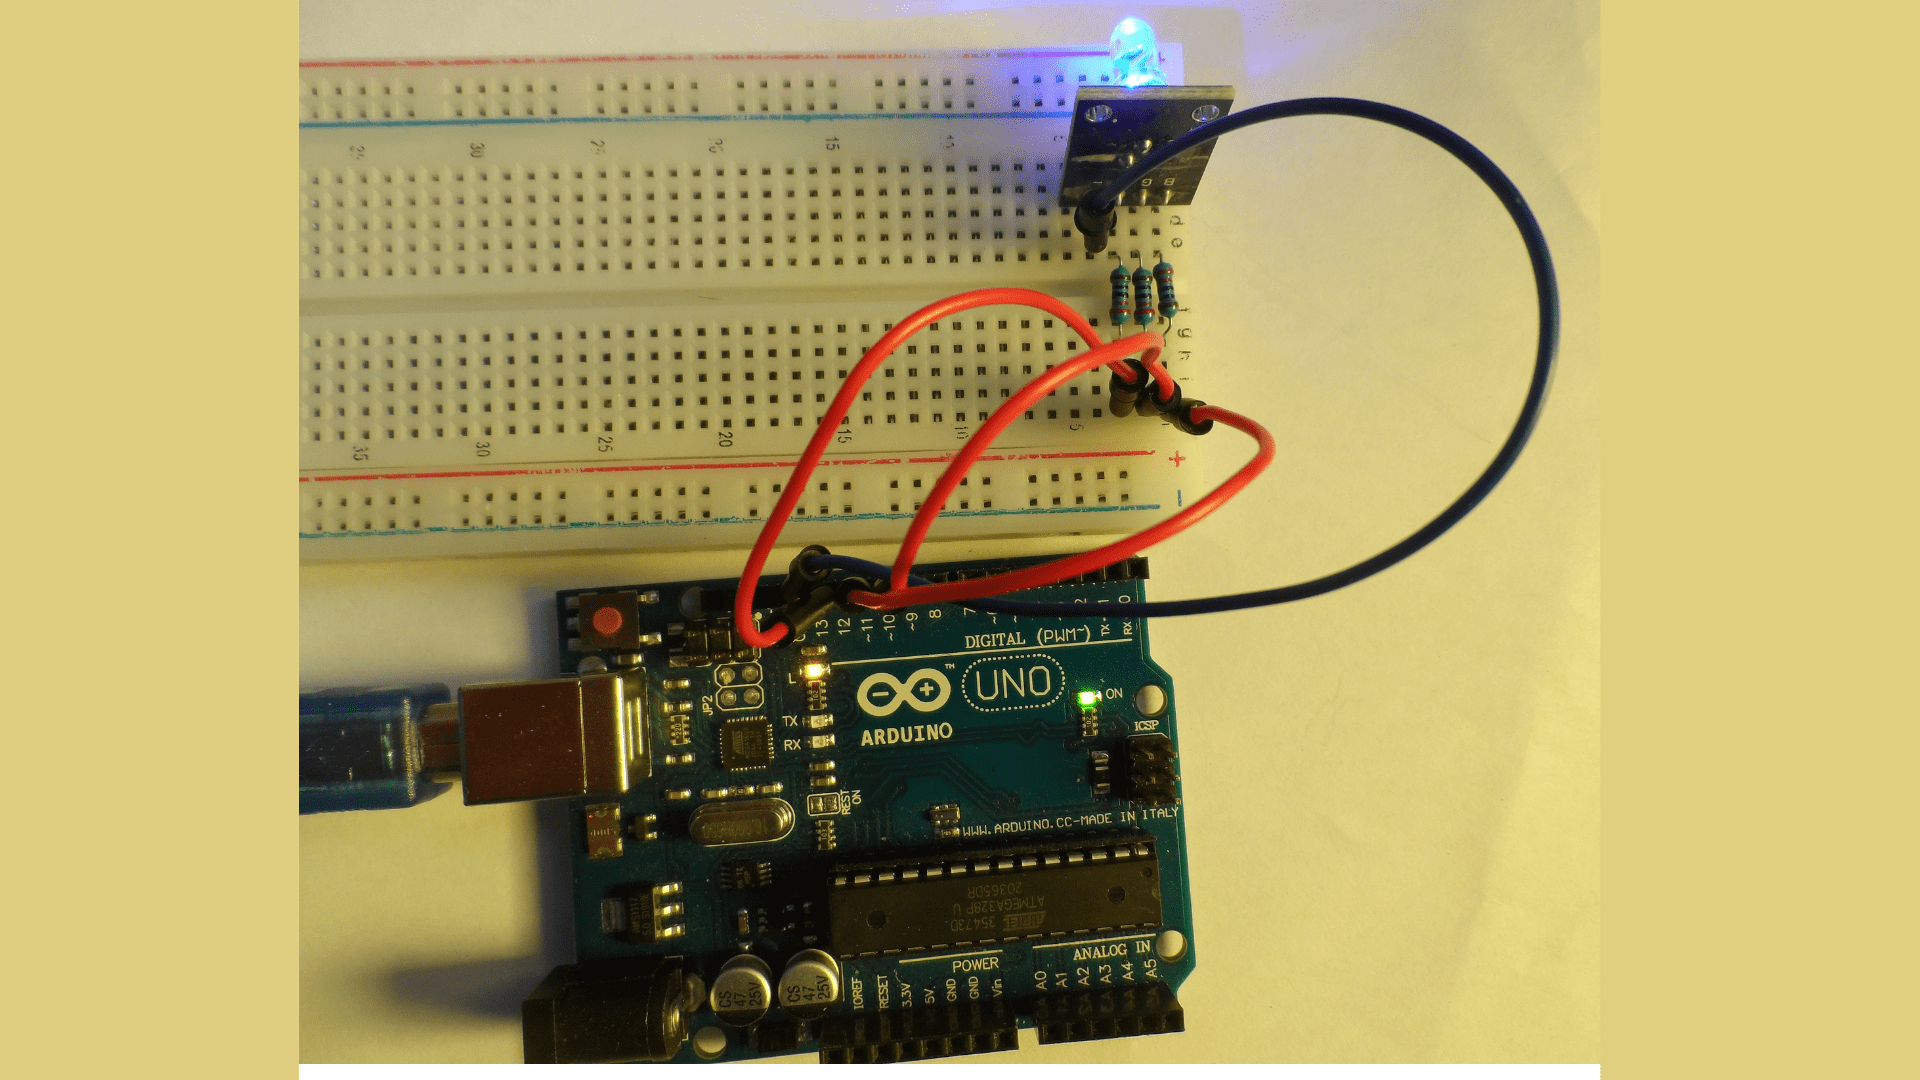
Describe the connection of the project
Connect the R leg of the RGB LED to the 220-ohm resistor.Connect the second leg of the 220-ohm resistor connected to the R leg to the 9 PWM pin of the Arduino Uno board.Connect the G leg of the RGB LED to the 220-ohm resistor.Connect the second leg of the 220-ohm resistor connected to the G leg to the 10 PWM pin of the Arduino Uno board.Connect the B leg of the RGB LED to the 220-ohm resistor.Connect the second leg of the 220-ohm resistor connected to the B leg to the 11 PWM pin of the Arduino Uno board.Connect the ground pin to the negative leg of the RGB LED.
Important note
Use an Arduino Uno if having one; If not, use the simulator from the website of Thinkercard.
A reminder before you start programming
A data type
A data type is a classification for the type of data that can be stored in a variable. It defines the possible values that can be stored in a variable and what operations are allowed. In this project, we will operate only the integer data type when we declare 3 variables to store the three Pwm Arduino Uno pins
Void setup() {} function
It is a function that is called to initialize the Arduino sketch. It is run only once when the Arduino starts up.
Start the program with a known state, a function called before any other function in the code.
Void loop(){} function
The void loop() is the primary function in the Arduino programming language.The void loop() executes over and over again.
The purpose of the void loop() function is to keep executing code until an interrupt or exception occurs.
AnalogWrite function
AnalogWrite is a function that allows you to write to an Arduino pin with a PWM signal. It is used to set the duty cycle of the output signal for analog input pins.
The analogWrite() function fixes the duty cycle of the PWM signal on an Arduino pin. The duty cycle is specified as an integer value between 0 and 255, where 0 corresponds to 0% and 255 corresponds to 100%.
A function call
A function call is a statement that tells the computer to execute a specific function.A function call can be executed by a function name or by specifying the parameters of the function.
Parameters are values that are passed to the function when it is called. They are often used to specify different data types, such as strings, integers, or floating-point numbers.
The RGB LED project code
 // We need to declare 3 integer variable to store the PWM pinsint red = 11;int green = 9;int blue = 10;void setup(){pinMode(green, OUTPUT);pinMode(blue, OUTPUT);pinMode(red, OUTPUT);}void loop(){analogWrite(red,0);analogWrite(green,255);analogWrite(blue,0);delay(1000);analogWrite(red,0);analogWrite(green,0);analogWrite(blue,255);delay(1000);analogWrite(red,255);analogWrite(green,0);analogWrite(blue,0);delay(1000);}
Rainbow Arduino Uno project
 int red = 11;int green = 9;int blue = 10;void setup(){pinMode(green, OUTPUT);pinMode(blue, OUTPUT);pinMode(red, OUTPUT);}void loop(){analogWrite(red,148);analogWrite(green,0);analogWrite(blue,211);delay(1000);analogWrite(red,75);analogWrite(green,0);analogWrite(blue,130);delay(1000);analogWrite(red,0);analogWrite(green,0);analogWrite(blue,255);delay(1000);analogWrite(red,0);analogWrite(green,255);analogWrite(blue,0);delay(1000);analogWrite(red,0);analogWrite(green,255);analogWrite(blue,255);delay(1000);analogWrite(red,255);analogWrite(green,127);analogWrite(blue,0);delay(1000);analogWrite(red,255);analogWrite(green,0);analogWrite(blue,0);delay(1000);}
Function integration
The parameters of a function
The parameters of a function are the input variables that can be changed to affect the output.

The coding
// C++ codeint red = 11;int green = 9;int blue = 10;void setup(){pinMode(green, OUTPUT);pinMode(blue, OUTPUT);pinMode(red, OUTPUT);}void loop(){RgbRainBow(148, 0 , 211);delay(1000);RgbRainBow(75, 0 , 130);delay(1000);RgbRainBow(0, 0 , 255);delay(1000);RgbRainBow(0, 255 , 0);delay(1000);RgbRainBow(0,255 , 255);delay(1000);RgbRainBow(255, 127 , 0);delay(1000);RgbRainBow(255, 0 , 0); delay(1000);}void RgbRainBow(int redRainBow , int greenRainBow, int blueRainBow){analogWrite(red, redRainBow);analogWrite(green, greenRainBow);analogWrite(blue, blueRainBow);}
Code abbreviation
I managed to shorten all these codes analogWrite(red,148);analogWrite(green,0);analogWrite(blue,211);The new code is RgbRainBow(148, 0 , 211);
we use the function void RgbRainBow(){}. Remember that the function is an algorithm which can be used to avoid repetition in the code.
