Preamble
This article is concerned with programming with Arduino Uno for beginners. In the introduction to this topic, we learn about the Arduino Uno.
How to adjust some of the settings related to the program through which the programming process occurs. After that, we will complete the first and simplest program for programming the Arduino Uno.
The benefit of learning programming
Programming is a skill that is in demand and will continue to be in demand as the world becomes more tech-driven. It’s essential for diversity since it tends to reflect the population and help solve diversity issues in tech.
Programming is a skill that is in demand and will continue to be in demand as the world becomes more tech-driven. Programming skills are sought after by many companies, including Google, Amazon, IBM, Facebook, and Microsoft.
There are many reasons why programming skills are beneficial. It teaches logical thinking, problem-solving skills, and analytical skills, all critical for success in life.
It also helps people understand how computers work, which can help them become better at using them.
Programming is not just about writing code. It is a way of thinking that can be applied to any problem, and it has several benefits, including:
– Developing logical, analytical, and creative thinking- Problem-solving skills- Improves cognitive abilities such as memory, attention span- Improves mental health by reducing stress levels
The benefit of learning C and C++
C and C++ are the two most popular programming languages. They are high-level languages that are used to create applications, operating systems, and games.
C was developed in 1972 and is the oldest of the two languages. It is a procedural language that uses English keywords to write programs.
C++ is an object-oriented language with many features like classes, inheritance, templates, and operator overloading. It was developed in 1983 by Bjarne Stroustrup as an extension of C.
The benefit of learning these languages is that they can be used for almost anything, from creating mobile apps to building complex systems like operating systems or databases.
What is Arduino Uno
Arduino Uno is the microcontroller board used for electronics projects. It is one of the numerous popular boards for hobbyists and beginners interested in taking their first steps in programming and electronics.
It can be used to create interactive objects, collect data from various sensors, or just about anything else you might want to do with a microcontroller.
The Arduino Uno has 14 Digital I/O pins (of which six can be used as PWM outputs), 6 Analog inputs, a 16 MHz ceramic resonator, an ATmega328P microprocessor, and a USB connection.
Programming with Arduino Uno for Beginners
Arduino programming is a skill that can be learned and improved with practice. It’s a skill that can be taught to children and adults interested in learning about electronics and programming.
To program the Arduino Uno, you need the Arduino IDE software on your computer.
The benefit of learning Arduino programming
In this section, I will be talking about the benefits of learning Arduino programming. First off, it teaches you how to work with circuits and electricity, which can be very helpful when you want to build your circuit board or create other electronic devices.
Secondly, suppose you are interested in robotics or any other type of engineering profession. In that case, this language will be advantageous for you because it can teach you how to control physical objects using code essential in these types of jobs.
Finally, Arduino also teaches you how to use a programming language called C/C++ which can help you with your future projects. There is an online IDE that you can use to write programs for Arduino called the Arduino software.
A Makefile will show you what files need to compile and upload for your project. This makes it very user-friendly for beginners who are just getting started with programming.
The Arduino software has a variety of helpful tutorials to help you out when things become complicated.
Download the IDE software
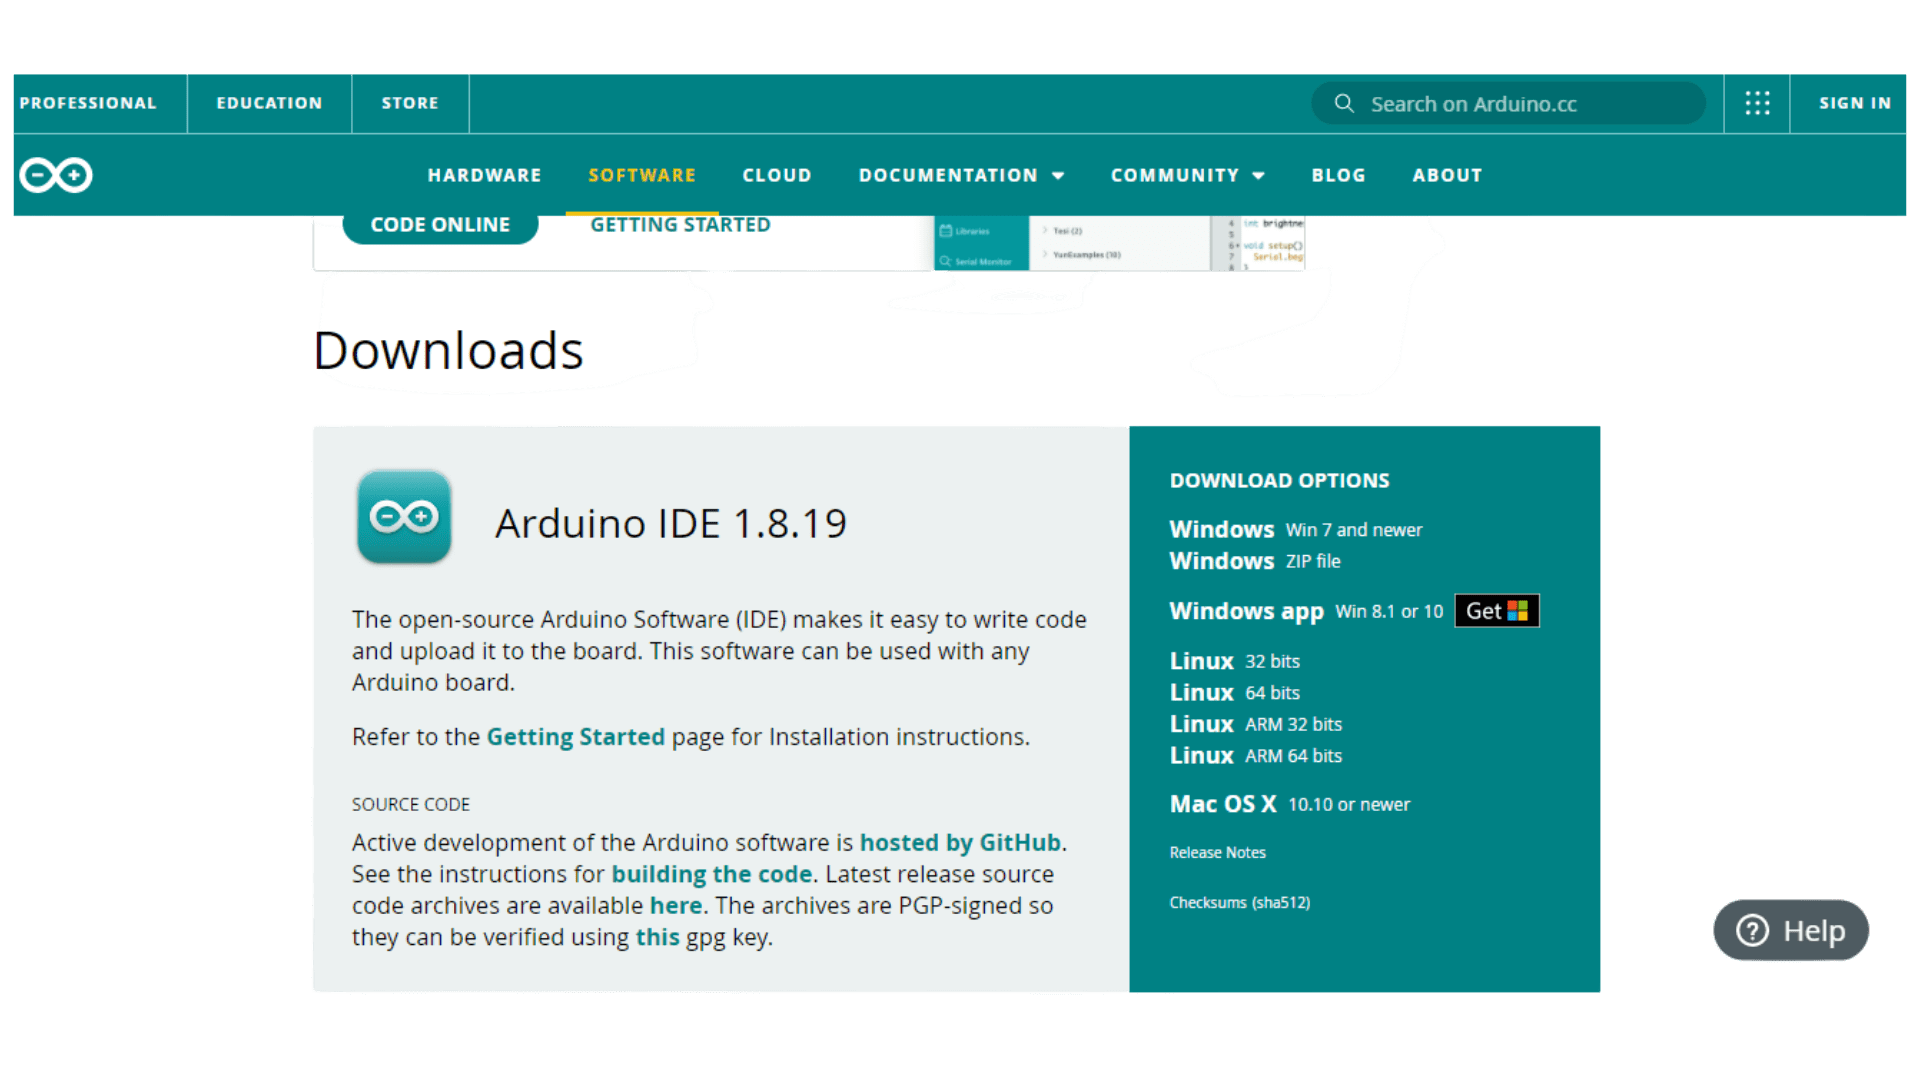
If you own an Arduino Uno, you’ll require the Arduino IDE software to program it. The Arduino IDE is a free download for Mac OS X, Windows, and Linux computers.
- -Go to the website https://www.arduino.cc/
- -Press the menu button called software.
- -Scroll down to the download button related to the laptop system.
- -download the IDE software of the Arduino
- -Unzip the downloaded file
- -Send the icon of the IDE software to create an icon for the software on the desktop.

Connect the Arduino Uno board to the laptop
No need to connect an Arduino Uno board with a computer; just plug it in and start to double-check some settings from the menu IDE bar.
-Tools——->board—–>Arduino Uno—->Arduino Uno-Tools—–>port——–>choose the correct board of the computer( COM ports).


Adjust some necessary settings for better readability
The user can make the lines of code bigger by making zoom in and zoom out: press the control button and zoom in and zoom out using the wheel mouse scrolling option.
 Another possibility for better readability:-Choose the file from the menu, press preferences, then edit font size and choose the suitable size. If you want to uncheck the automatic option, you can increase the level of percentage.
-Tick the display line number: The Arduino IDE has a display line number. This is an excellent feature for debugging and troubleshooting your code.-Click “OK” to save your changes.

Programming with Arduino Uno for beginners
It is time to plug the Arduino Uno board and start programming.The Blink sketch is one of the examples in Arduino.
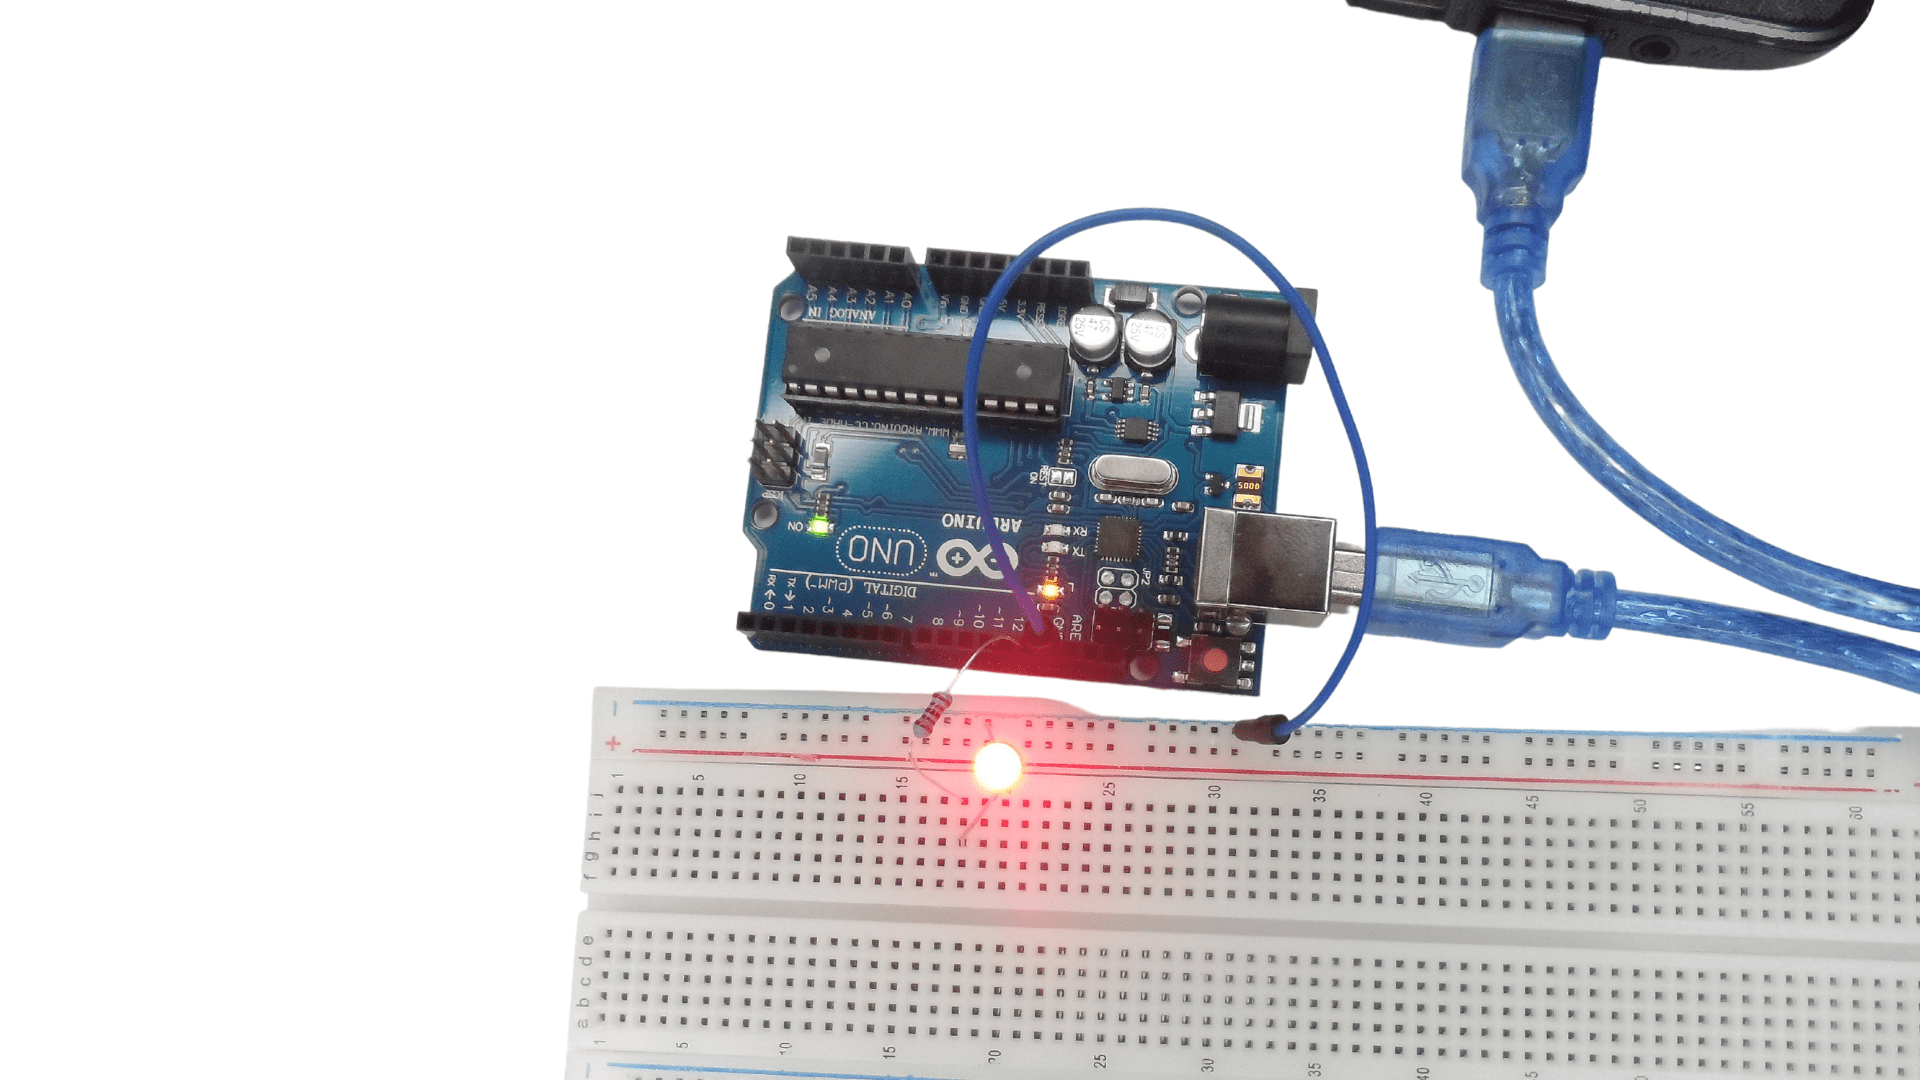
The Blink sketch is a program that blinks a LED on and off for one-second intervals.
void setup() {// the setup function executes once when you press reset or power the boardpinMode(LED_BUILTIN, OUTPUT);}
void loop() {// the loop function excutes over and over again foreverdigitalWrite(LED_BUILTIN, HIGH); // turn the LED on (HIGH is the voltage level)delay(1000); // wait for a second
digitalWrite(LED_BUILTIN, LOW); // turn the LED off by making the voltage LOWdelay(1000); // wait for a second}
 This program will blink an LED connected to digital pin 13.The user can make his custom program within two steps:
- Step one: increase or decrease the delay high LED level
- Step two: increase or decrease the delay low LED level
 This is the first level to complete the project; the second level is to show the results outside the Arduino itself.
While working on an Arduino project, it may be necessary to restart the Arduino if there is an error.There are three ways to restart the Arduino Uno:
Ways to restart the Arduino Uno
-Power of The Arduino Uno: unplug the USB cable and plug the USB cable again into your computer. This way is not the best way to restart the Arduino Uno board.
-Press the reset button of the Arduino Uno.
-Press the arrow button the program will restart.The third way is the best way to restart the program.
Debugging is a process that allows developers to find and fix errors in the code. Debugging also helps to improve the quality of the code.
The Arduino IDE provides some tools for debugging, but they are not enough to debug complex code.
Debugging an Arduino sketch can be done in two ways:
- The “traditional” way is by inserting debugging statements into the sketch and then compiling and uploading it.
- Using an external debugger such as Serial Monitor or GDB Server is more powerful than the traditional approach.
The Arduino Serial Monitor is a straightforward application that allows you to send messages from your computer to the Arduino board. It is used for debugging, but it can also be used for sending commands to the device.
This tool is available on the Arduino IDE, and it can be found in the Tools menu under “Serial Monitor.”The monitor serial lets us know what happens in the program from the Arduino Uno to the computer. We need to use communication between the Arduino Uno and the computer.
It is only a serial communication through the USB cable to get some information. This is a logging functionality. The serial communication does not need any additional setup.
If we desire to be more practical, we turn to see how this happens at the level of the audio program and the computer and with the Arduino.The code needed is as chown above.
// the setup function runs once when you press reset or power the board
void setup() {Serial.begin(9600);Serial.println(“I am a programmer”);}
// the loop function runs over and over again, forevervoid loop() {Serial.println(“I am a good programmer.”);delay(10000);}You need to:
- Choose the 9600 option from the scrolling list.
- Tick the auto-scroll option
- Choose the no line ending from the scrolled list as shown under.
It would be best if you put “println”. Print means to print the phrase given. The ln means Line break.This blog is an introduction to Arduino Uno programming.

I will focus on future articles to learn concepts related to programming principles in the C and C++ languages.
