Introduction
In this article, I will talk about a topic that anyone who needs to start an Arduino Uno project without having the required hardware; Build Arduino Uno Circuits with Tinkercad: create a prototype and simulate with code and even without coding to build an Arduino Uno project.

What is Tinkercad
Tinkercad is a web-based program that allows users to design and create circuits. the program lets beginners to Building Arduino Uno Circuits with Tinkercad.
Tinkercad is an online platform for designing and building electronic circuits, specifically ones that are made using the popular Arduino Uno.
On Tinkercad, you create circuits by choosing a design type and adding components like switches, LEDs, resistors, and power sources.
The idea behind Tinkercad is that it provides the ability to design a circuit without learning how to use a dedicated circuit board software, reducing the time and cost of developing your project.
People with no technical background can use this tool, but it’s most useful for those with some knowledge of electronics and programming.
Tinkercad is a website where you can design and create electronic circuits, currently the most popular site for circuit designers.
https://www.tinkercad.com/ is a website that has been around for a while, but its popularity has increased.
To whom is Tinkercad directed?
Tinkercad is the most comfortable way to start learning circuits and then building Arduino Uno projects for students and beginners. Tinkercard platform has an interactive circuit editor.
The user can explore components and different ways to code and connect Arduino Uno projects.Tinkercad is software that lets the user build circuits with components like sensors, servomotors, voltmeters, and others.
Using the site is very easy. It is enough for you to register with your email or Facebook account, and after starting to build your own Arduino circuits, using programming or through ready-to-use codes. The user can share his projects with others if he wants.
There are sixteen languages available on the Tinkercad platform.
First project with Tinkercad
Log in to the platform using your email or Facebook account. The dashboard is available.

- Choose to Create the first circuit to create your first project.
- Click the Circuits button in the left menu of the dashboard.
Pre-made project
The blink Arduino project
Test a circuit design with the simulator as an educational step, and click the start simulation button. The simulation is done, and the project is running.
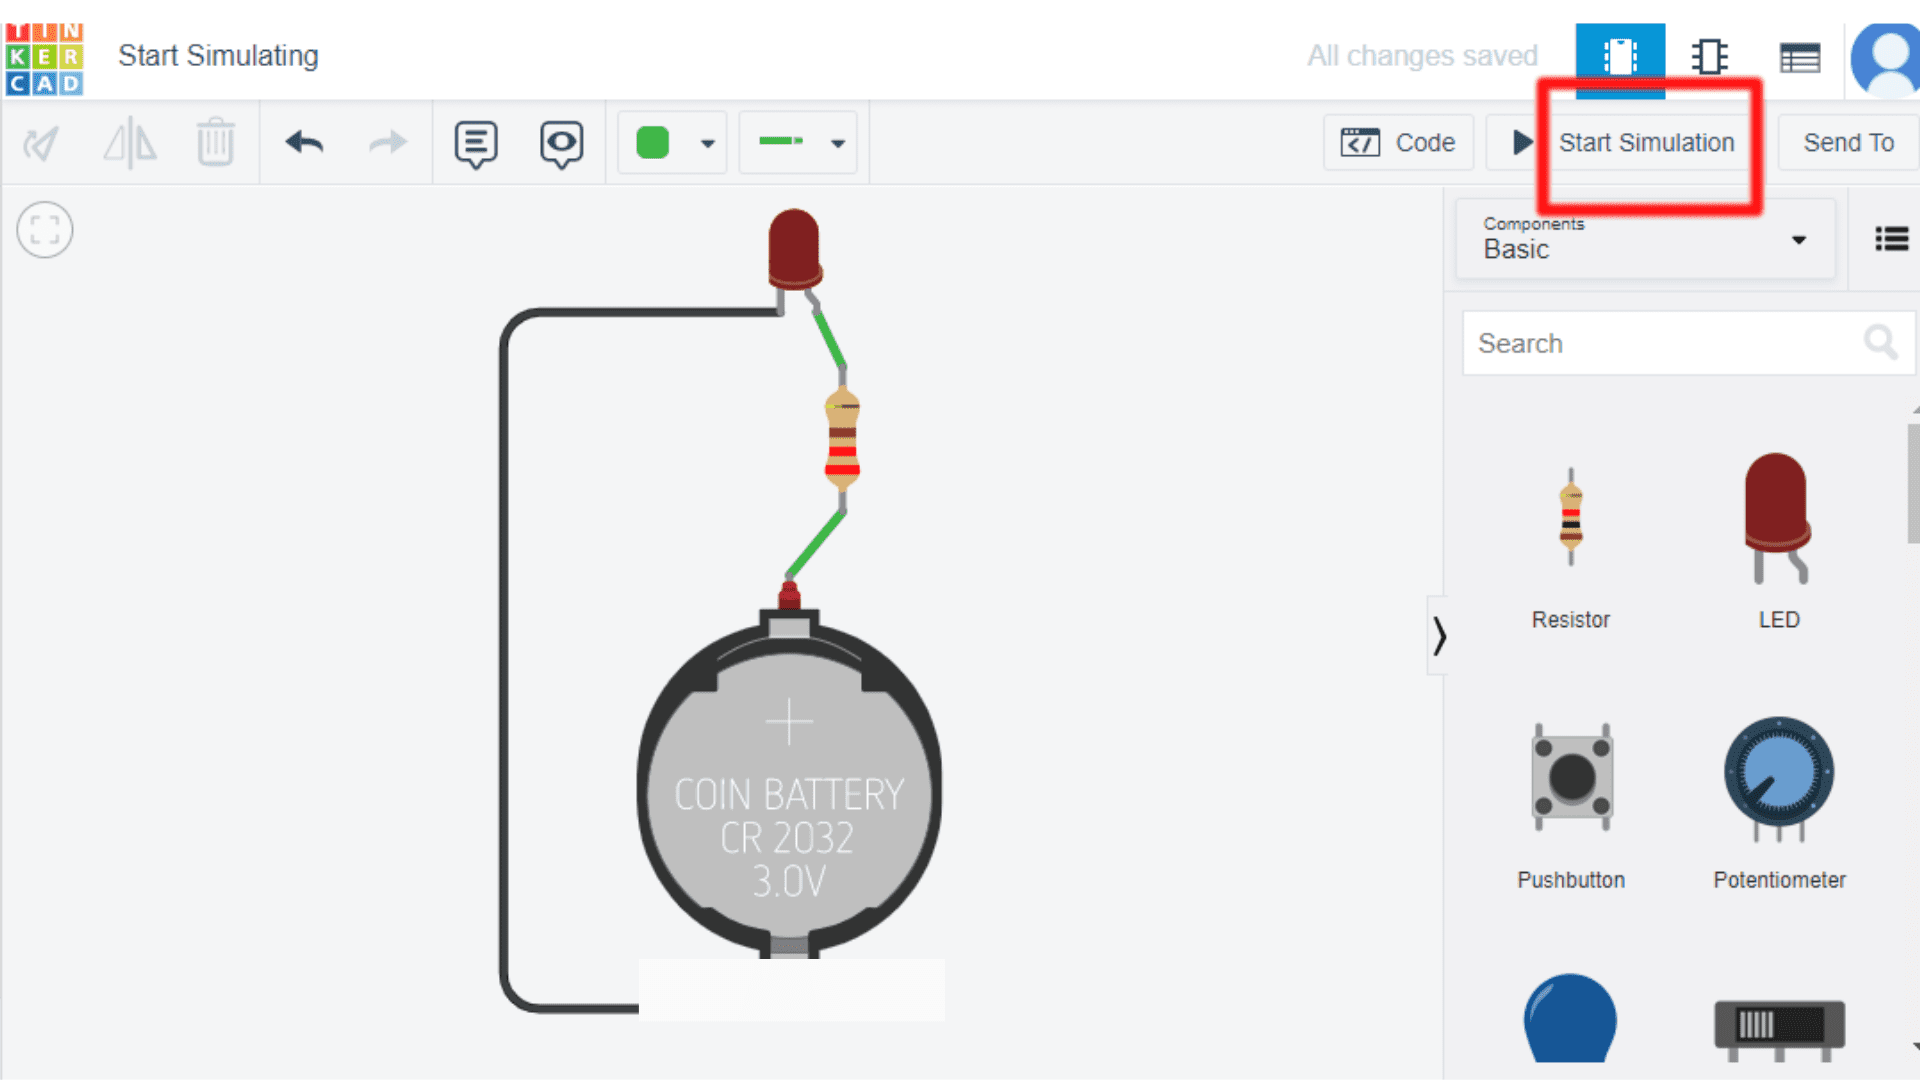
 Many Arduino projects can be seen in the program and start simulation experience for them.The blink Arduino project is a widespread yet straightforward introduction to electronics.
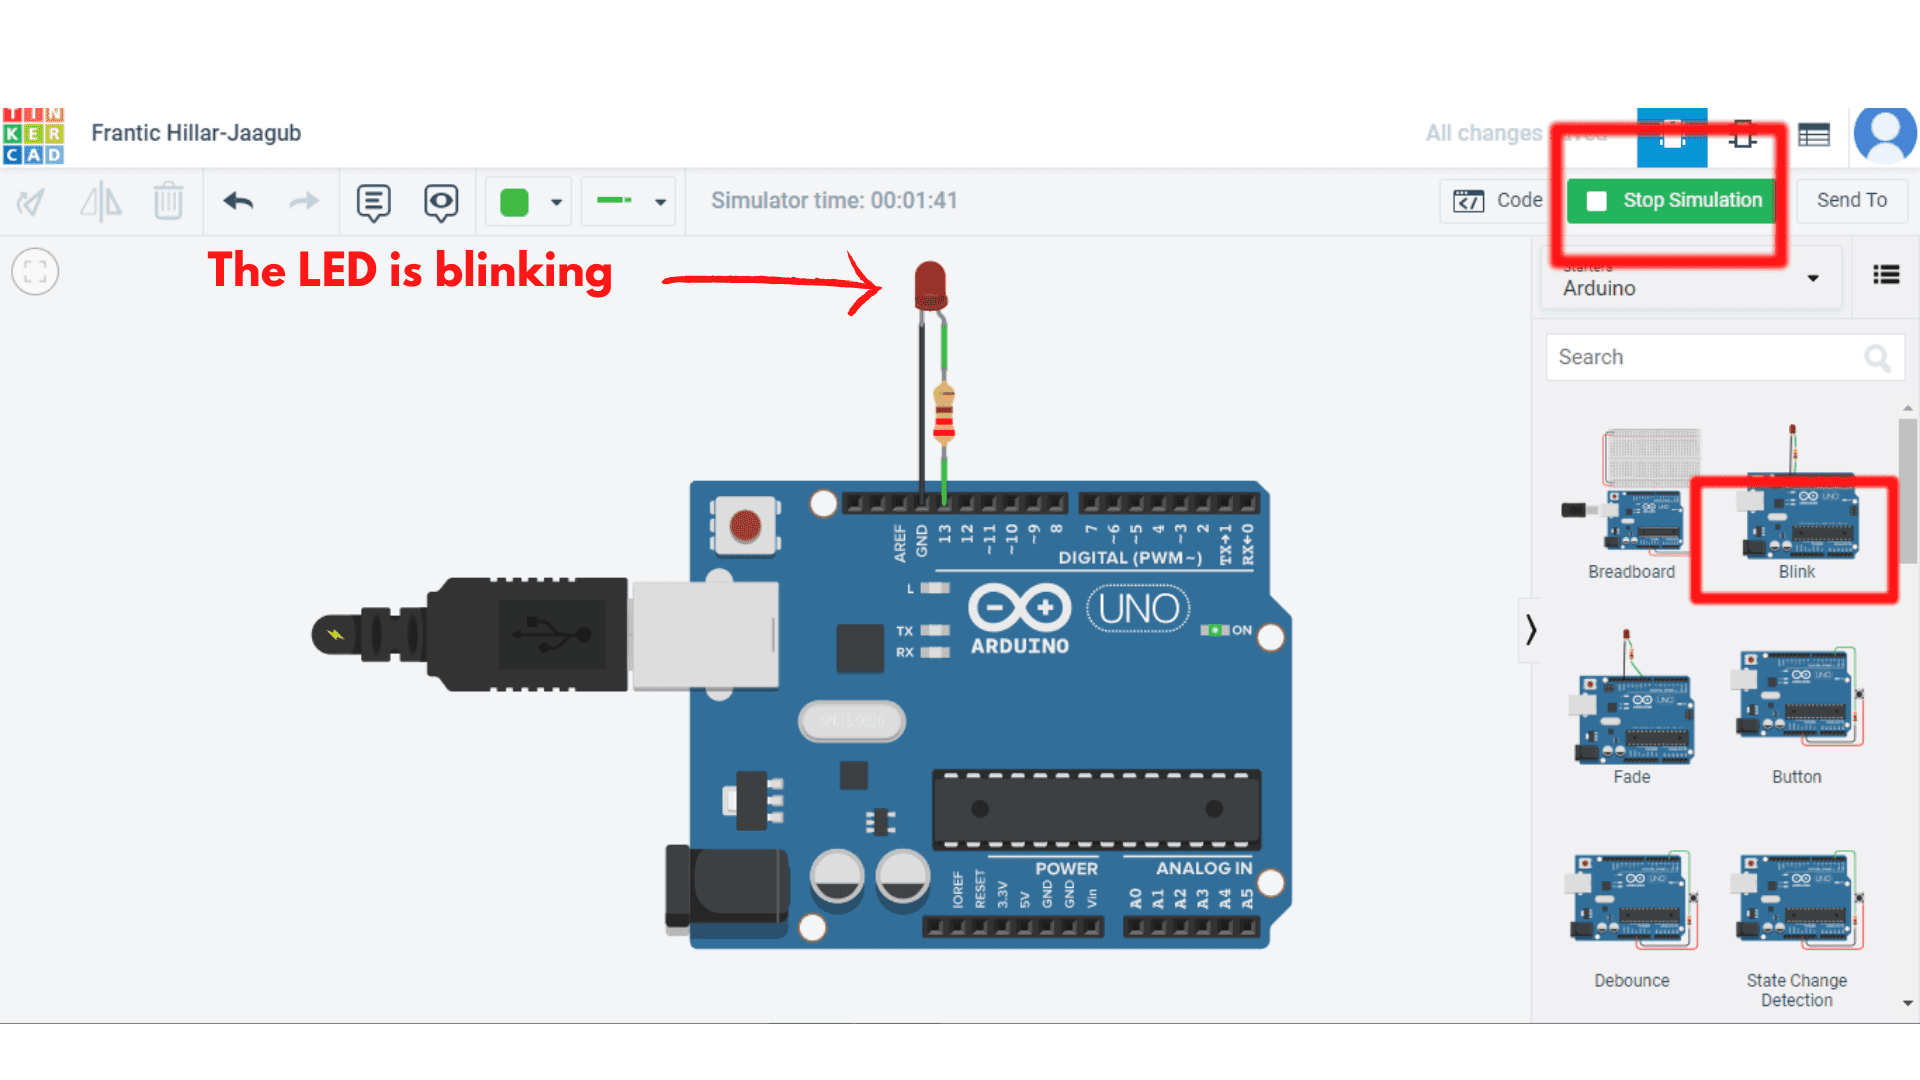
This project uses an Arduino board to blink an LED on and off.The beginner user can simulate this project using Tinkercad.
The blink Arduino project is a simple introduction to electronics that anyone can use to learn about the basics of circuits and programming.The LED is blinking..
The project uses the Tinkercad simulator.
Fade arduino project
The fade Arduino project is one of the most popular projects. It is a project that uses an Arduino board to create a light show using LEDs.
The idea came to me when thinking about making my room more exciting and interactive with LED lights. The result of the project will make the LED fade in and out.
Fade Arduino project is a DIY project that allows you to create your fading LED light switch. This project is effortless to build, and it is a great way to learn more about Arduino Uno.
Use the Thickercard software to simulate the projectTo make the Fade Arduino, you will need:
- Arduino UNO
- 10mm LED
- Piezo buzzer
- 330 Ohm resistor
- Breadboard
- Male jumper wires
The project uses the Tinkercad simulator.

State change detection Arduino project Thickercard Simulation
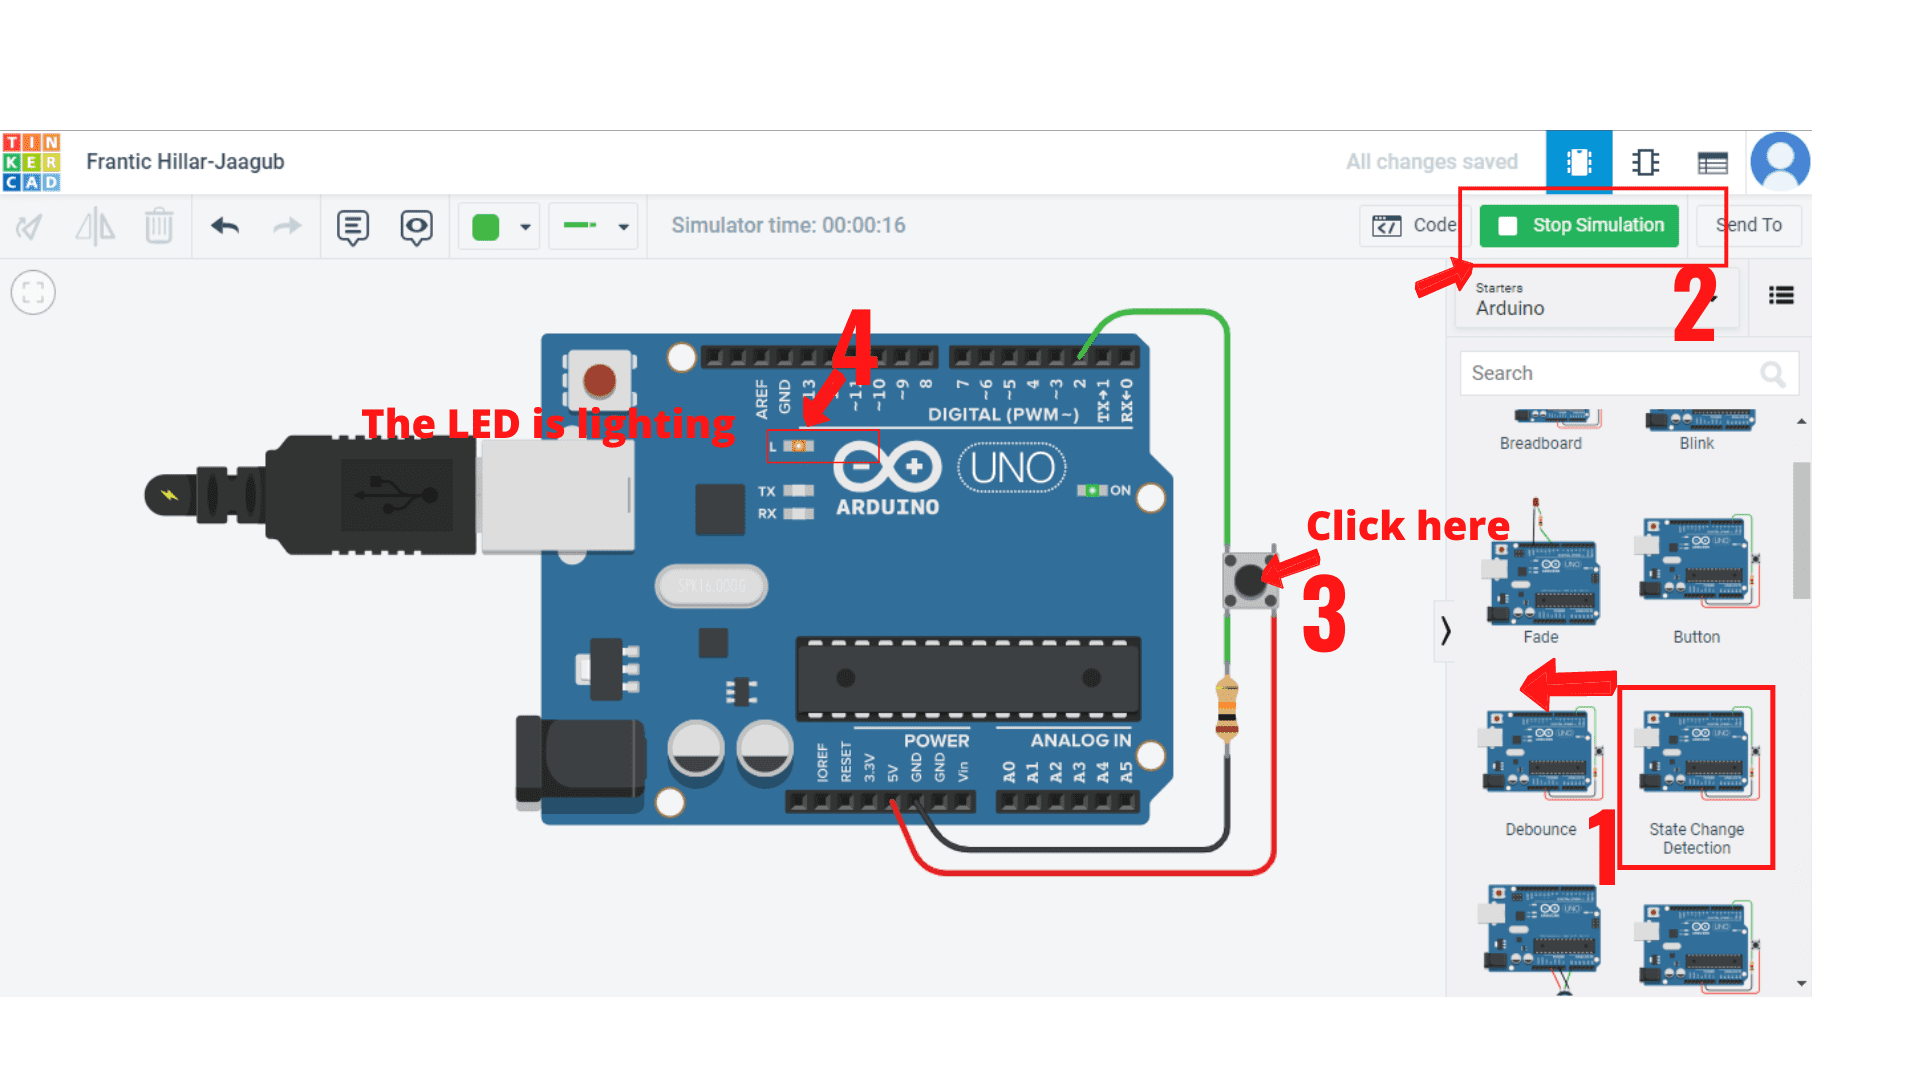
This project is an Arduino project that uses a state change detection circuit to detect when a switch is turned on and off.
The user clicks the push button to switch between turning on and off the led of the Arduino.
The project uses the Tinkercad simulator.
Debounce a push button Arduino project
This project uses the Arduino Uno to debounce a push button.This project uses the Arduino to debounce a push button. The Arduino is programmed to wait for a specific time before sending an input signal again after receiving one.
When the user presses the push button with a mouse click, we use simulation with Tinkercad software.

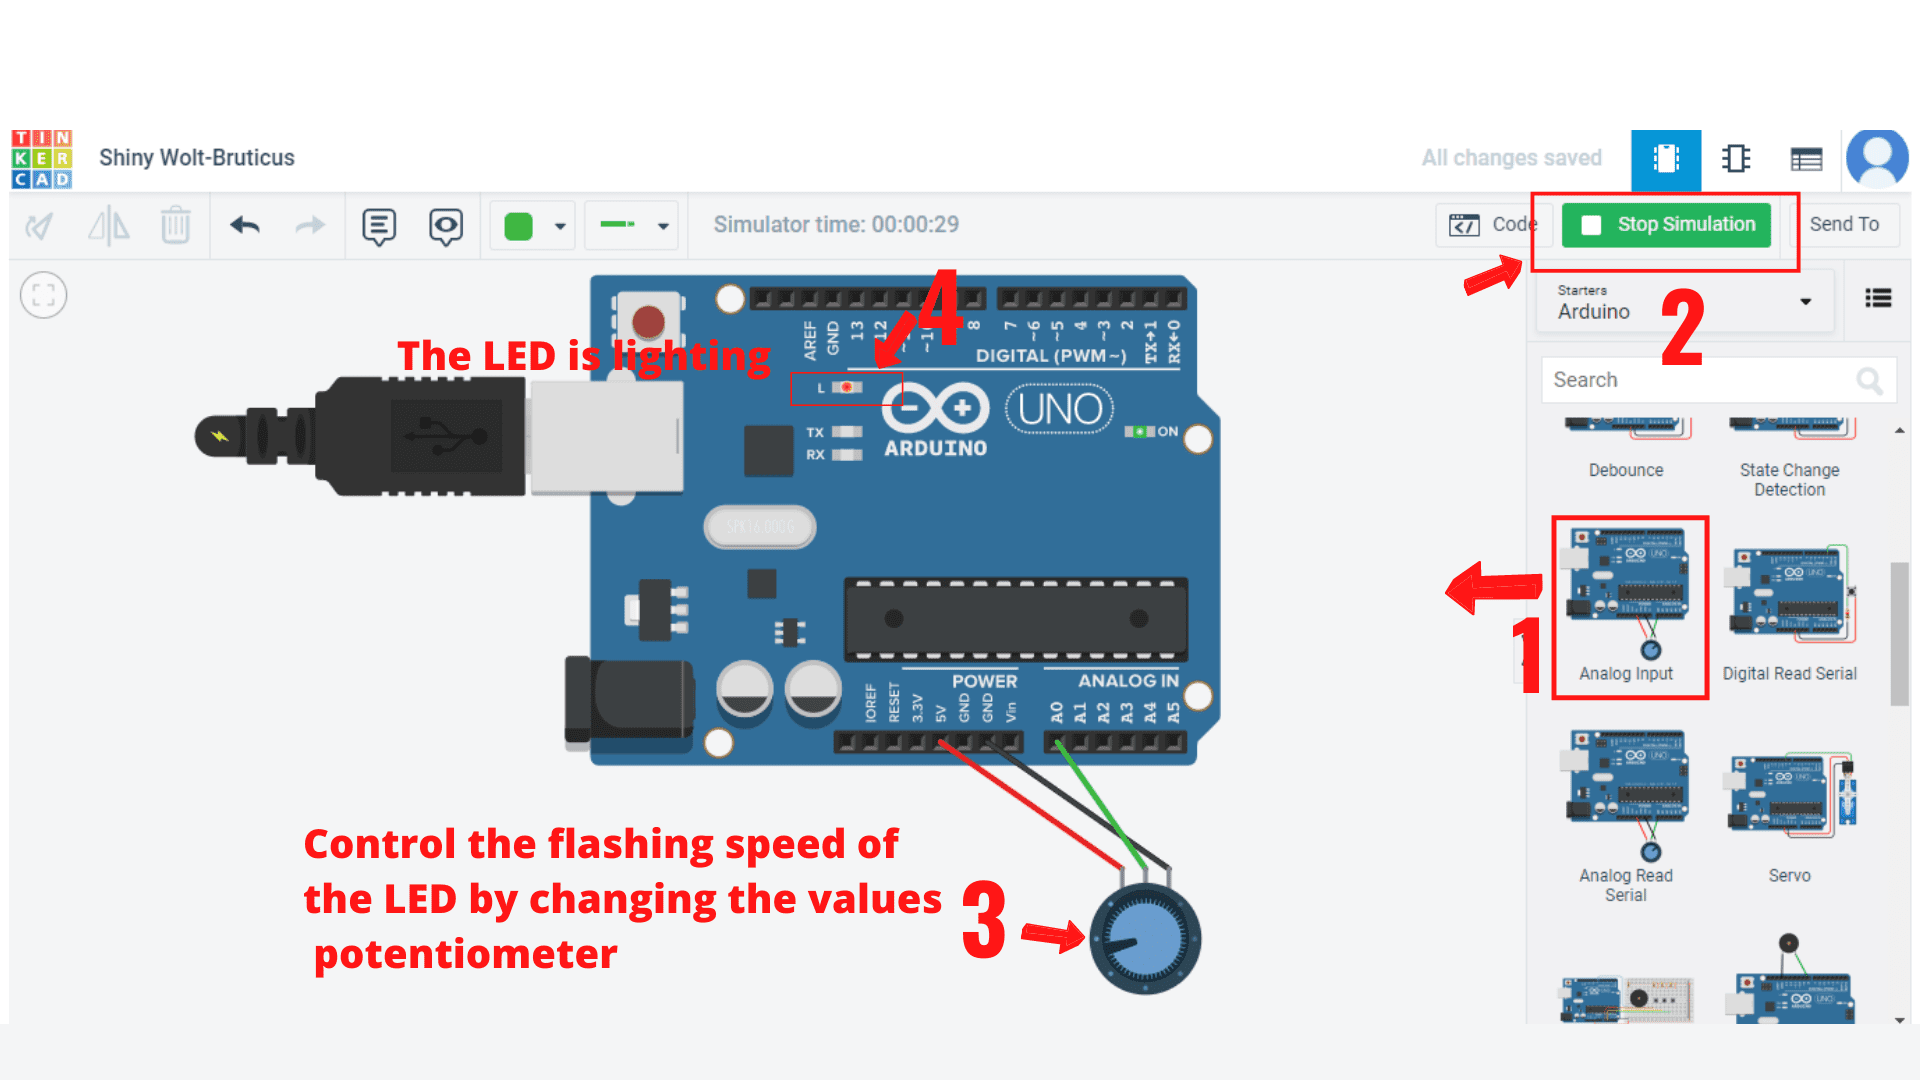
Analog input Arduino project
Analog input can be achieved through a potentiometer, the simplest analog input form. Potentiometers are often found in most consumer electronics and industrial machinery, such as measuring robots and industrial equipment.
The potentiometer creates an analog output based on the position of the knob or slider on the device. This is a sample project simulation using tinkercad
Servo Arduino project
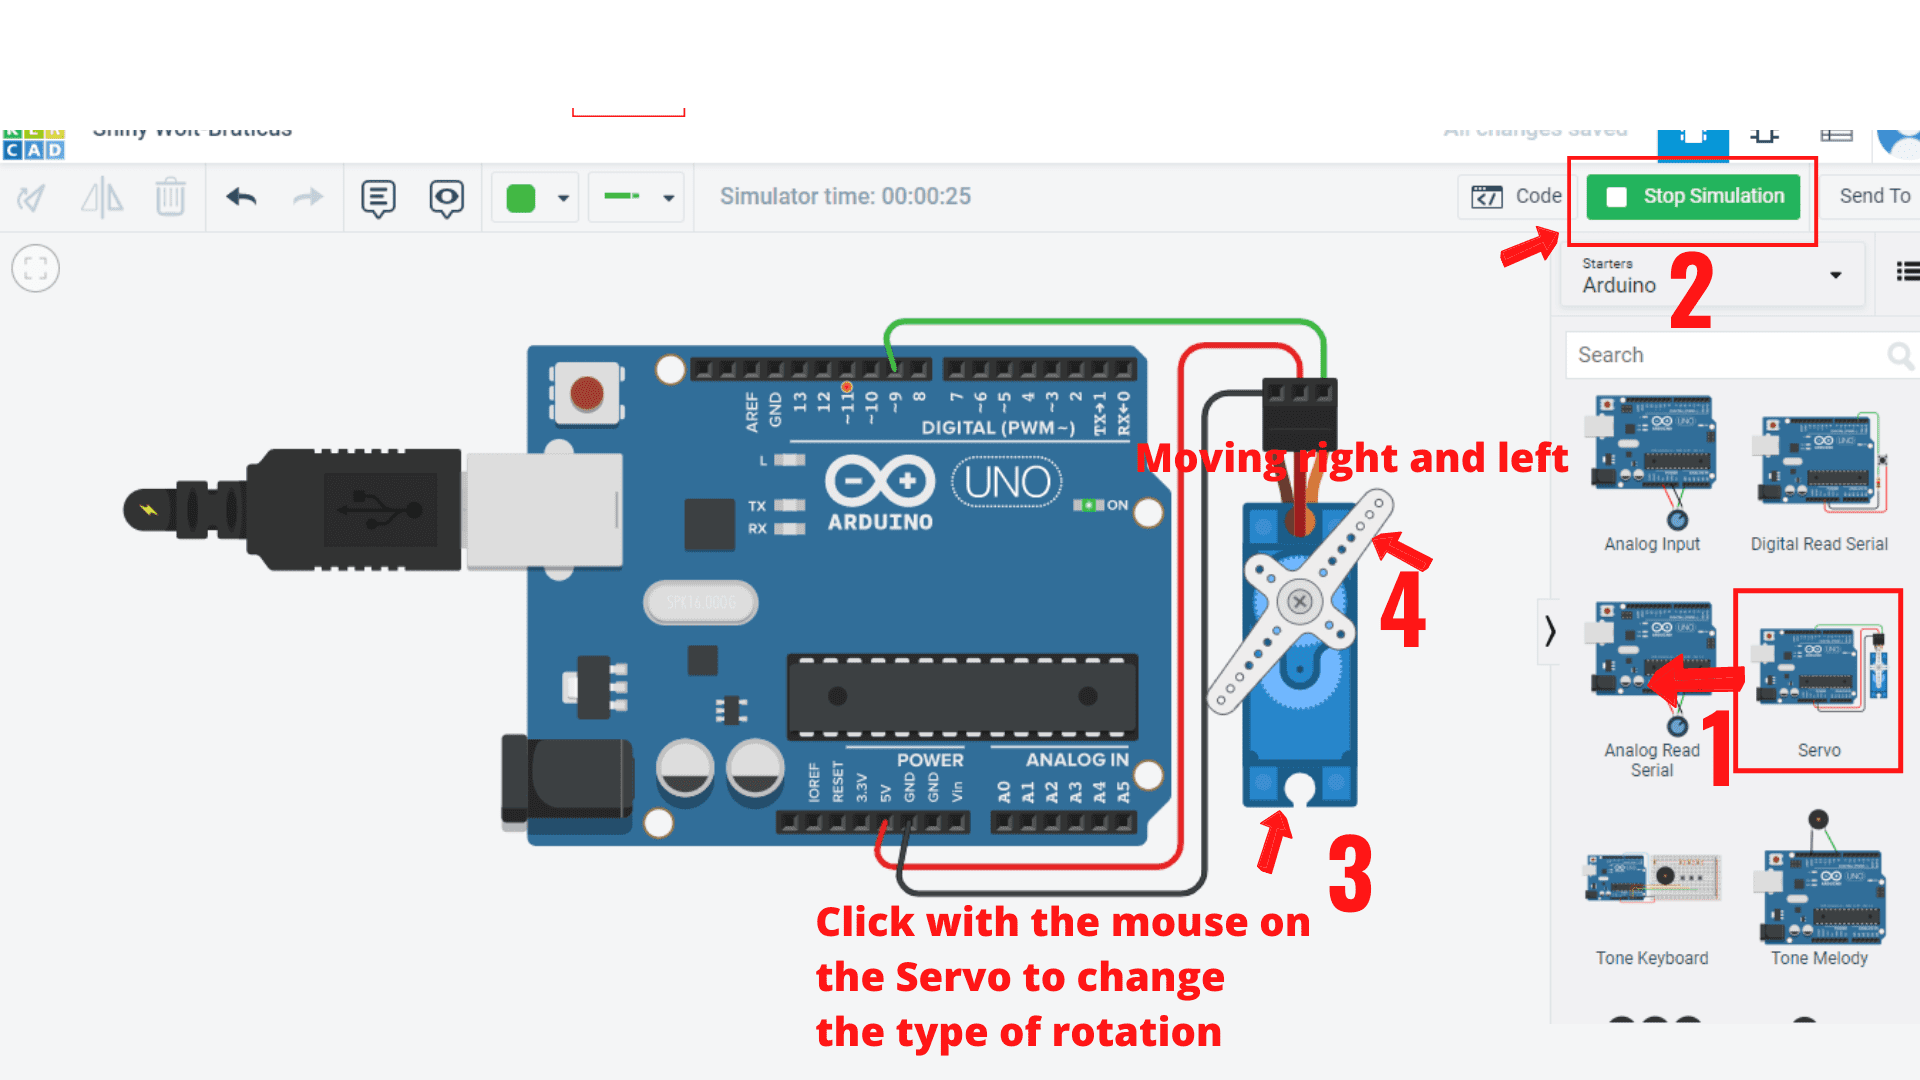
The Servo Arduino project is a project created by the Arduino community to help make controlling servos easier.
It uses the Arduino IDE to help control servos, and it has been used in several projects like making a robot arm and an RC car.The community created the Servo Arduino to make controlling servos easier. It uses the Tinkercad simulator for this project.
Tone keyboard Arduino Project
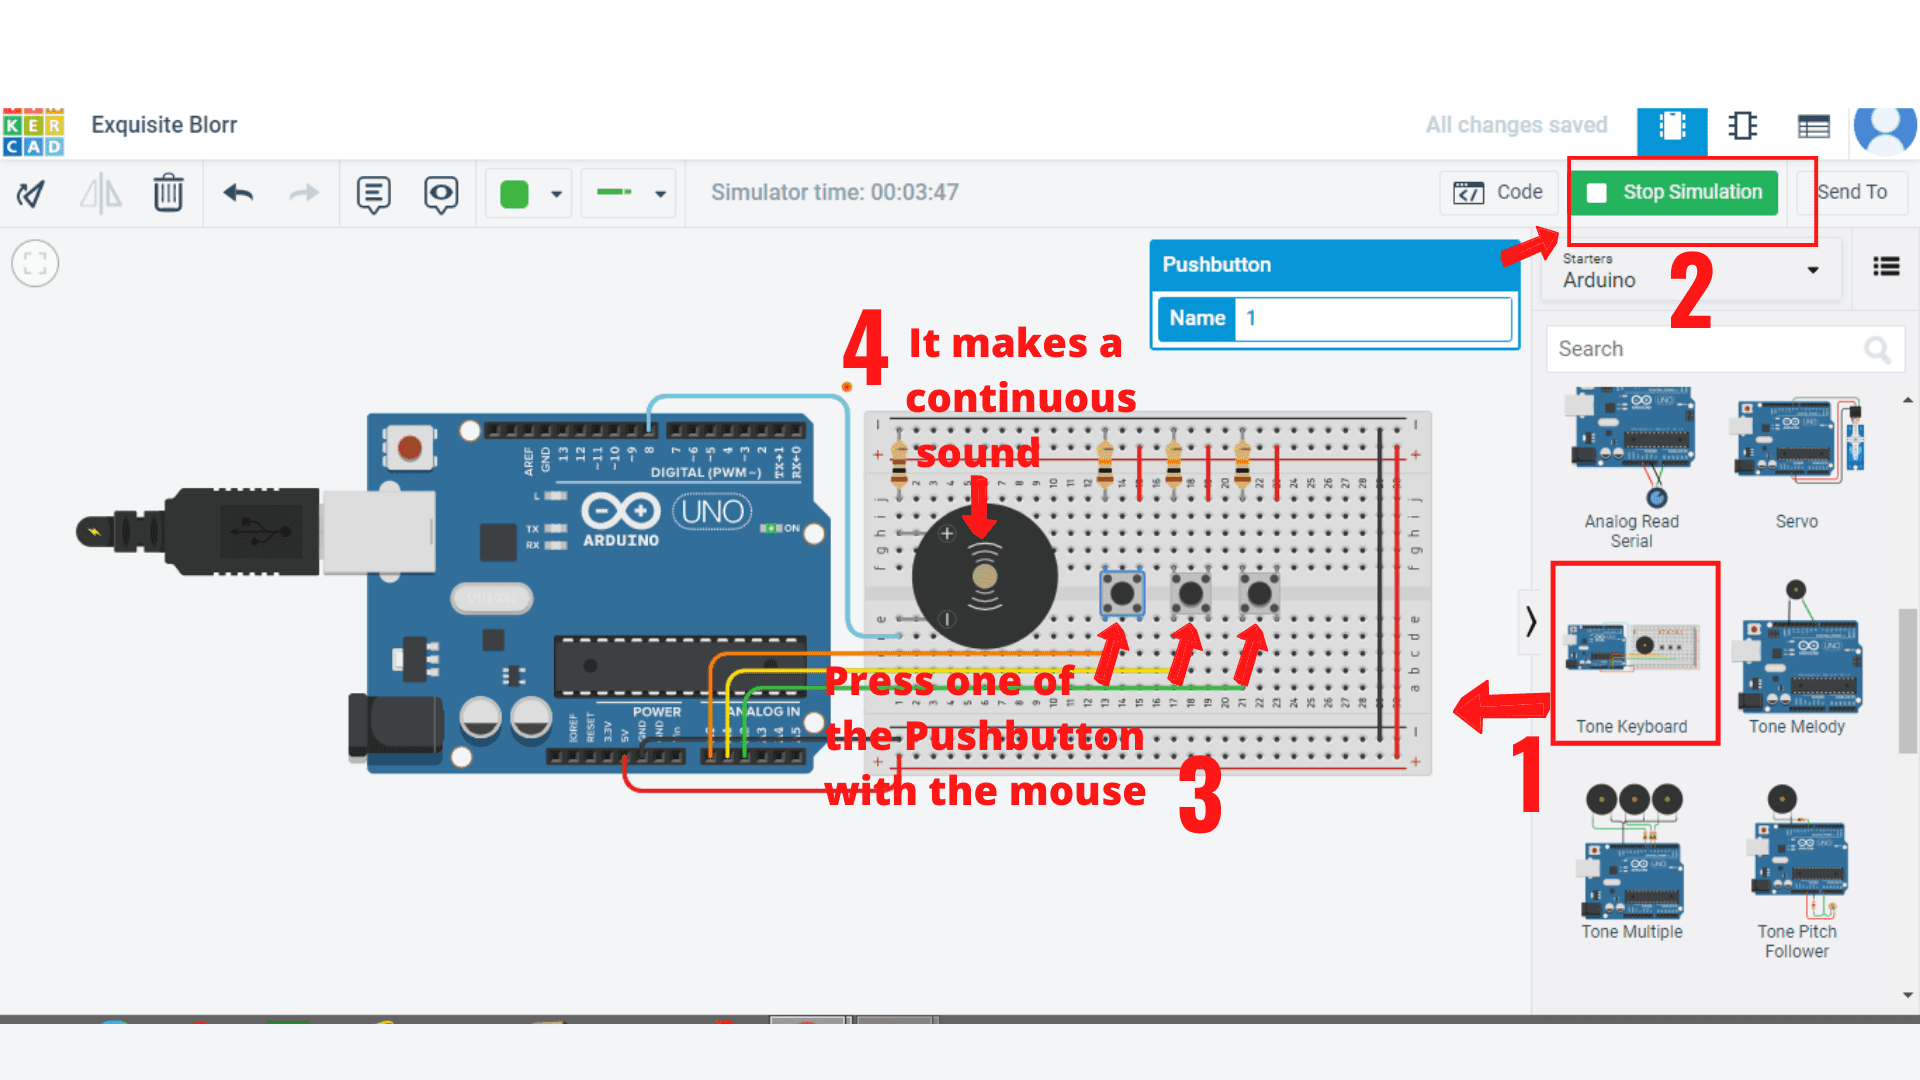
This project is a tone keyboard that an Arduino can control. It is designed to play any sound with just a keypress. It is designed to play any sound with just a keypress.
Press one of the Pushbutton. It uses the Tinkercad simulator for this project.
Melody sound
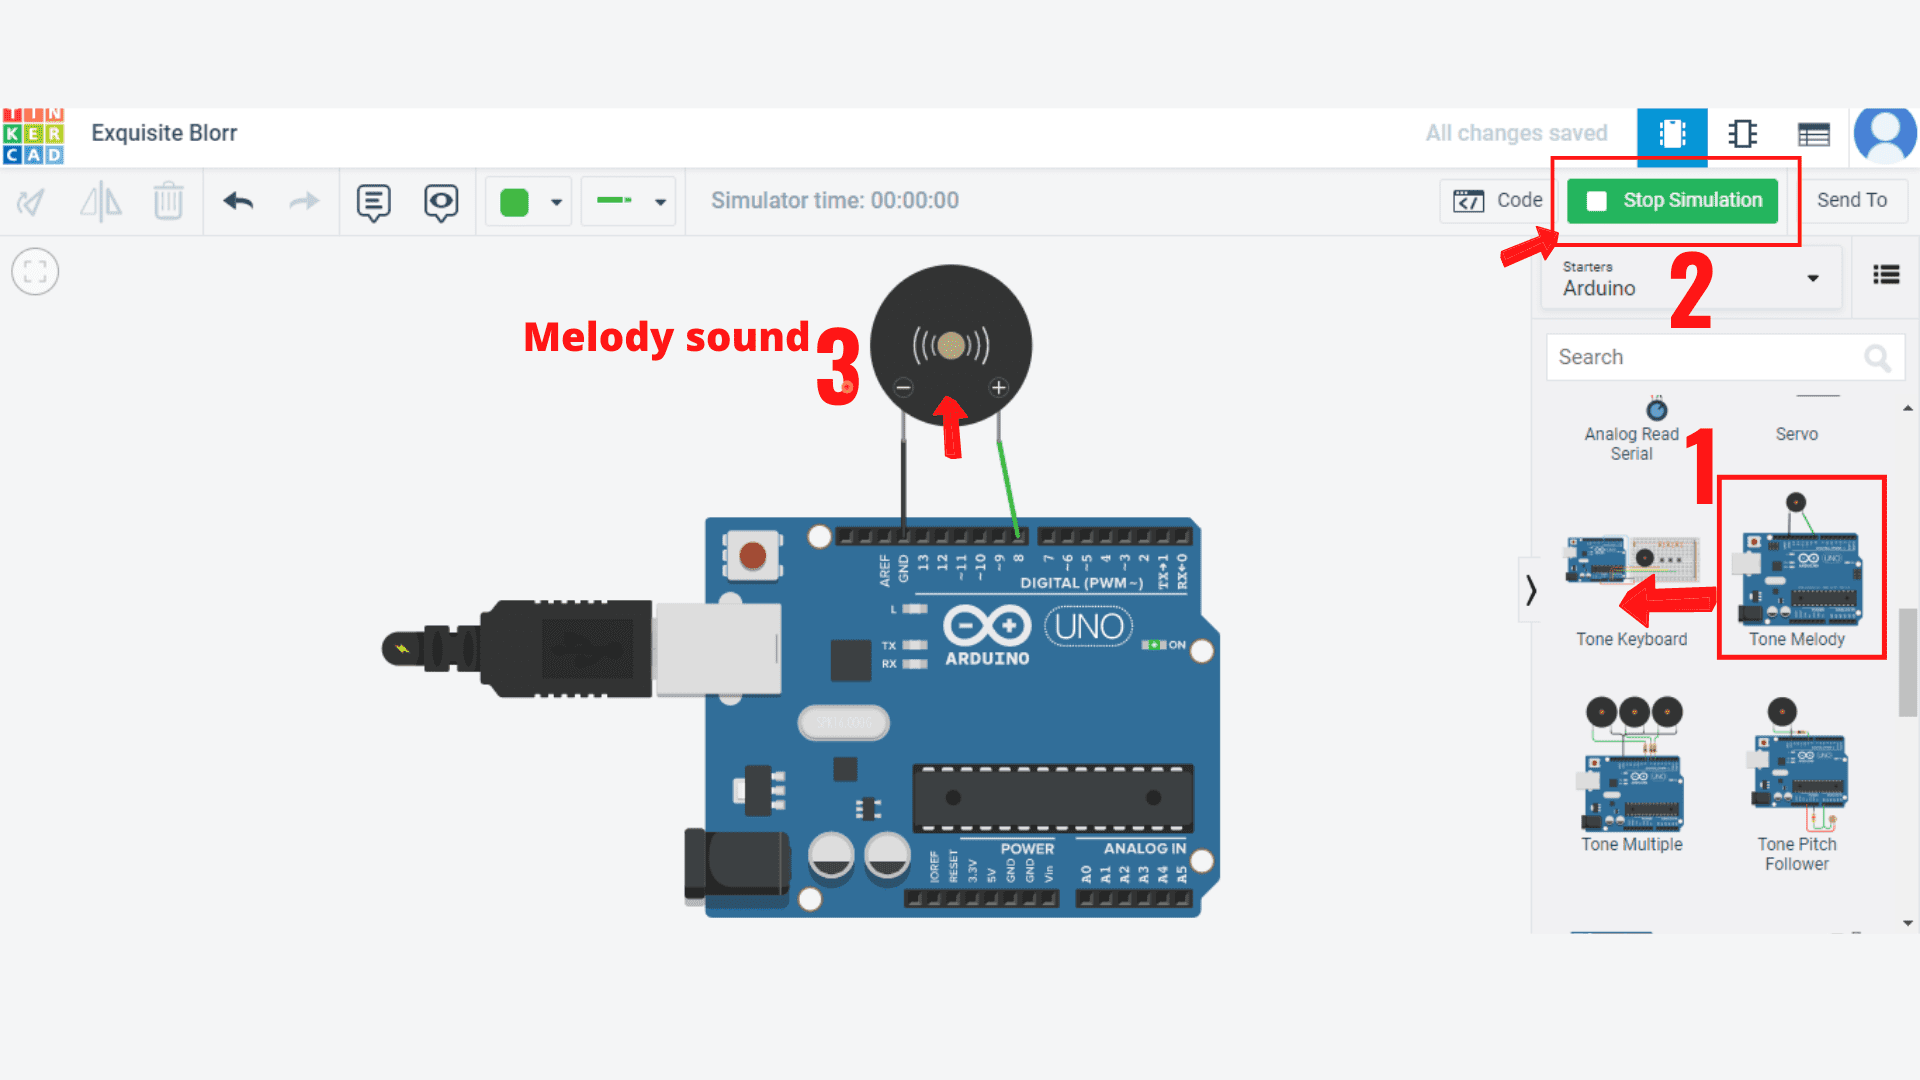
This project is about how to make a melody sound using an Arduino Uno.
The Melody Sound Arduino Project is a fun project that uses a Tinkercad simulator to create a melody sound.
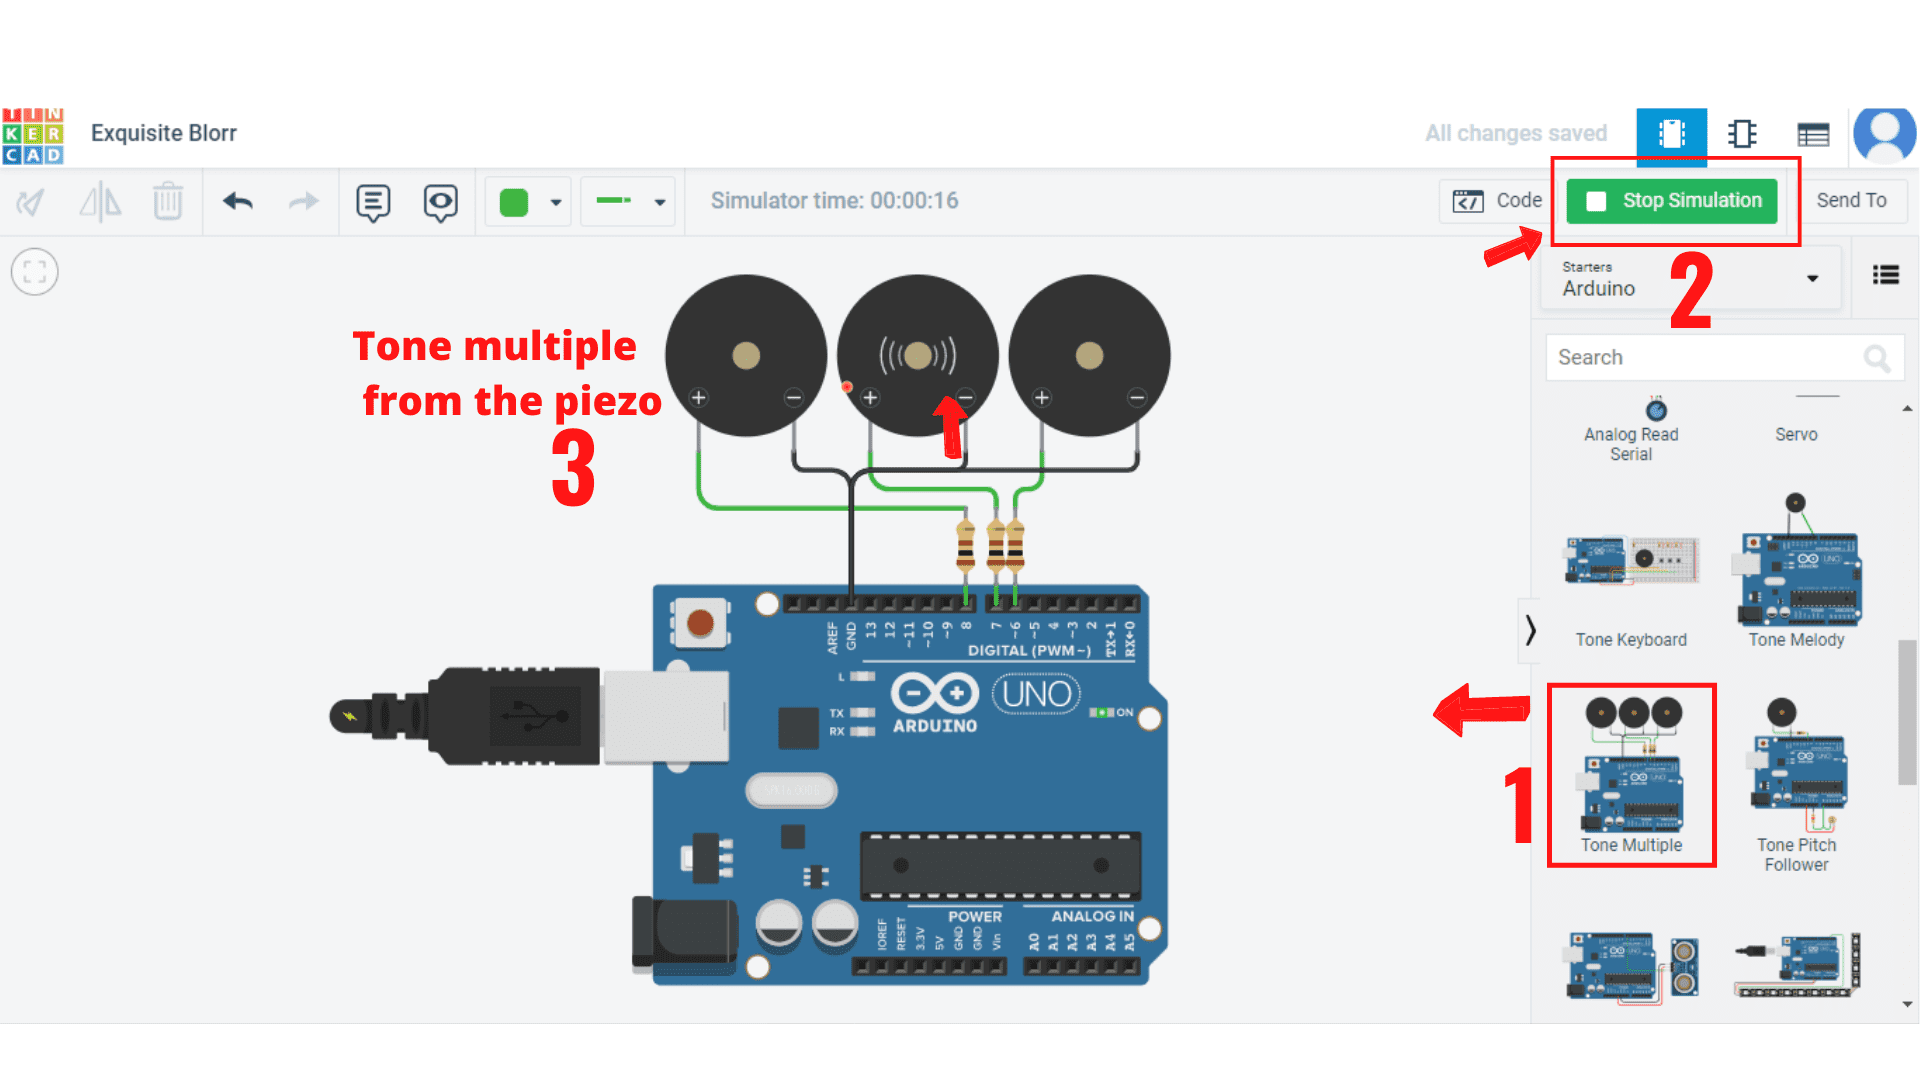
Tone multiple from the piezo
The piezo Arduino project is a set of Arduino boards connected to the piezo. The Arduino board controls the piezo and when it is triggered, it will play a tone.This project is not just fun, but also useful for people who need to make their musical instruments.
The project uses the Tinkercad simulator.
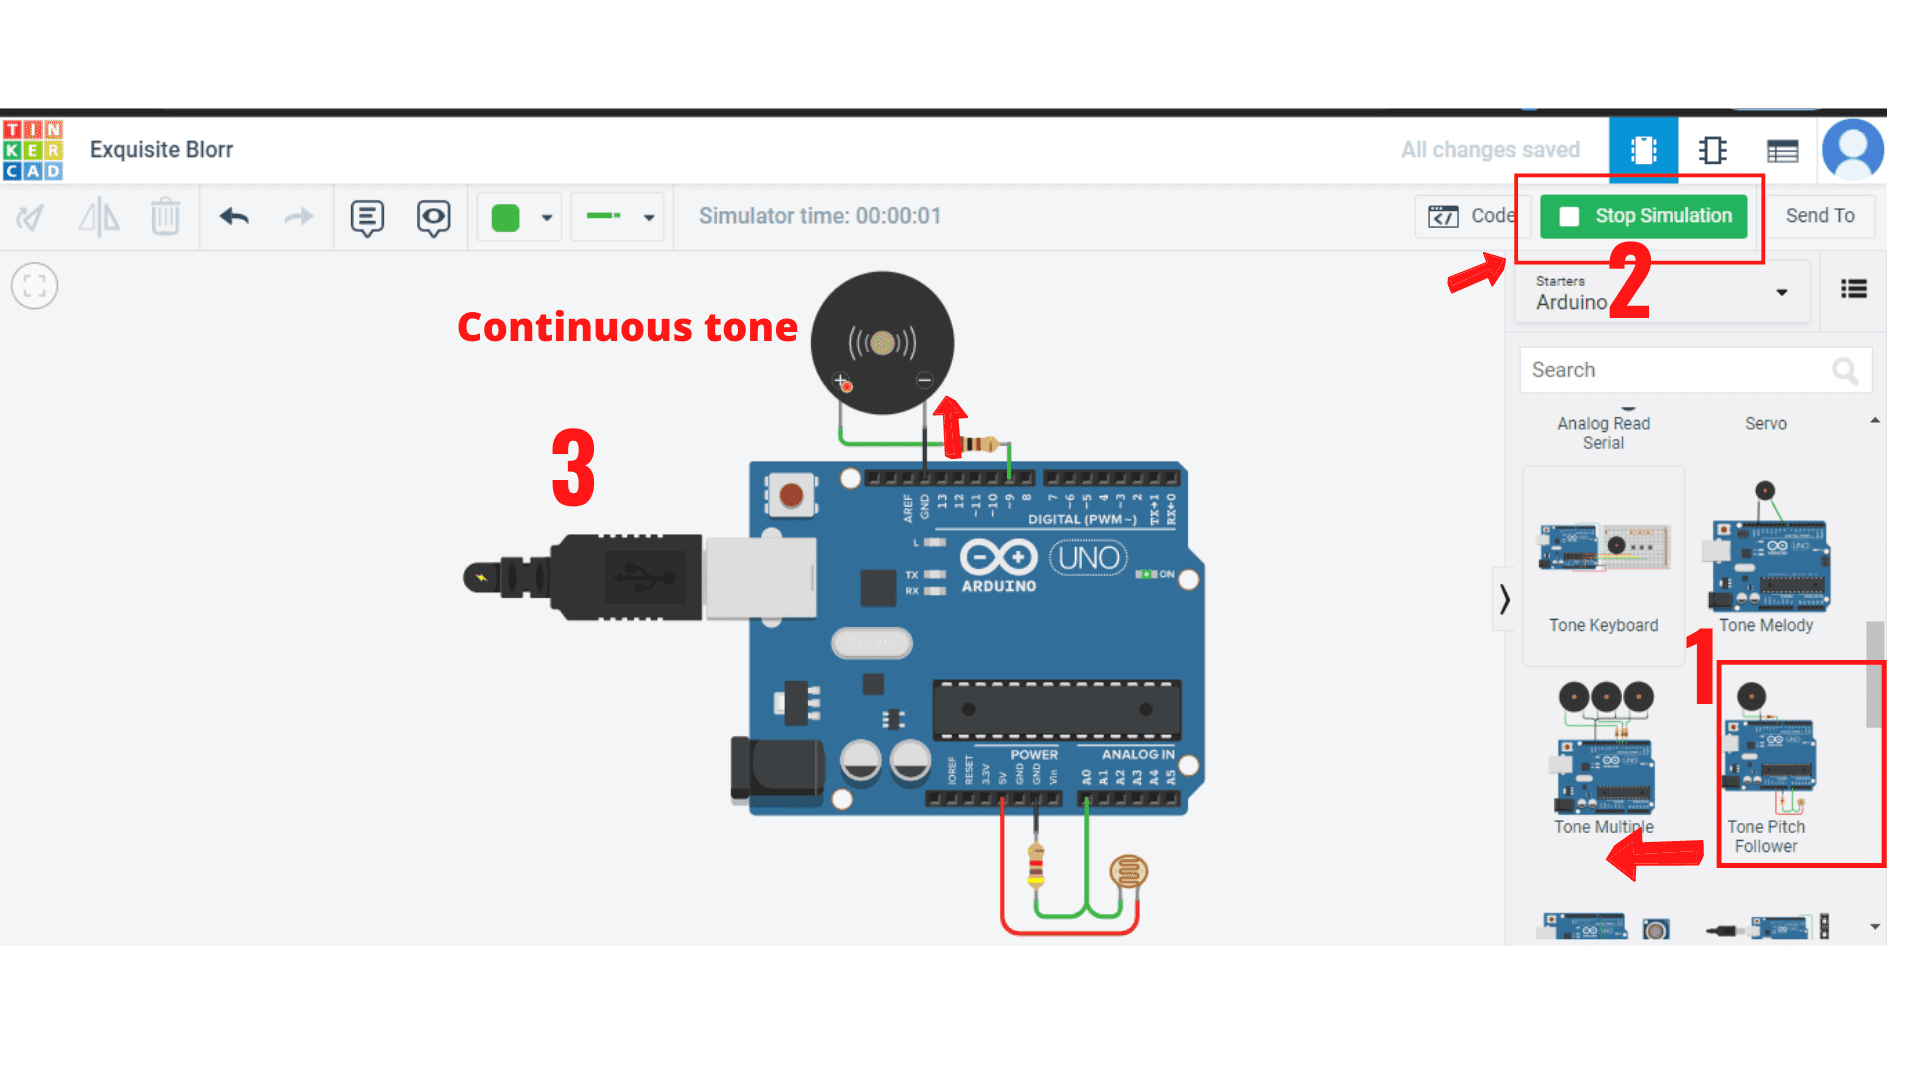
Tone pitch follower Arduino project
The tone pitch follower is a simple Arduino circuit that can generate tones and pitches. This project uses the Arduino Uno for generating tones.
This circuit has been designed to work with an input voltage ranging from 0-5V, so it can be powered by a 9V battery or a power adapter of up to 5V.
The project uses the Tinkercad simulator.
Ultrasonic range finder using Arduino
An ultrasonic range finder is a sensor that uses sound waves to detect the distance to an object. It works by transmitting sound waves and measuring the time it takes for these waves to bounce off of an object and return.
The speed of sound in air is roughly 340 m/s, so the time it takes for the wave to travel from transmitter to receiver is equal to the distance between them.
An ultrasonic range finder can be used in a variety of different ways. For example, you can use one as a burglar alarm or security system, or you can use one as a pet-monitoring device.
The project uses the Tinkercad simulator.

Neopixel Arduino project
This is a simple and easy project to build using the Arduino platform.The idea behind this project is to create a neopixel Arduino Uno project.
It uses an Arduino Uno and neopixels, which allows the user to control the brightness of the LEDs by changing the number of neopixels on it.
This is an excellent way for beginners to get their hands dirty with electronics. The project uses the Tinkercad simulator.
![]()
LCD arduino project
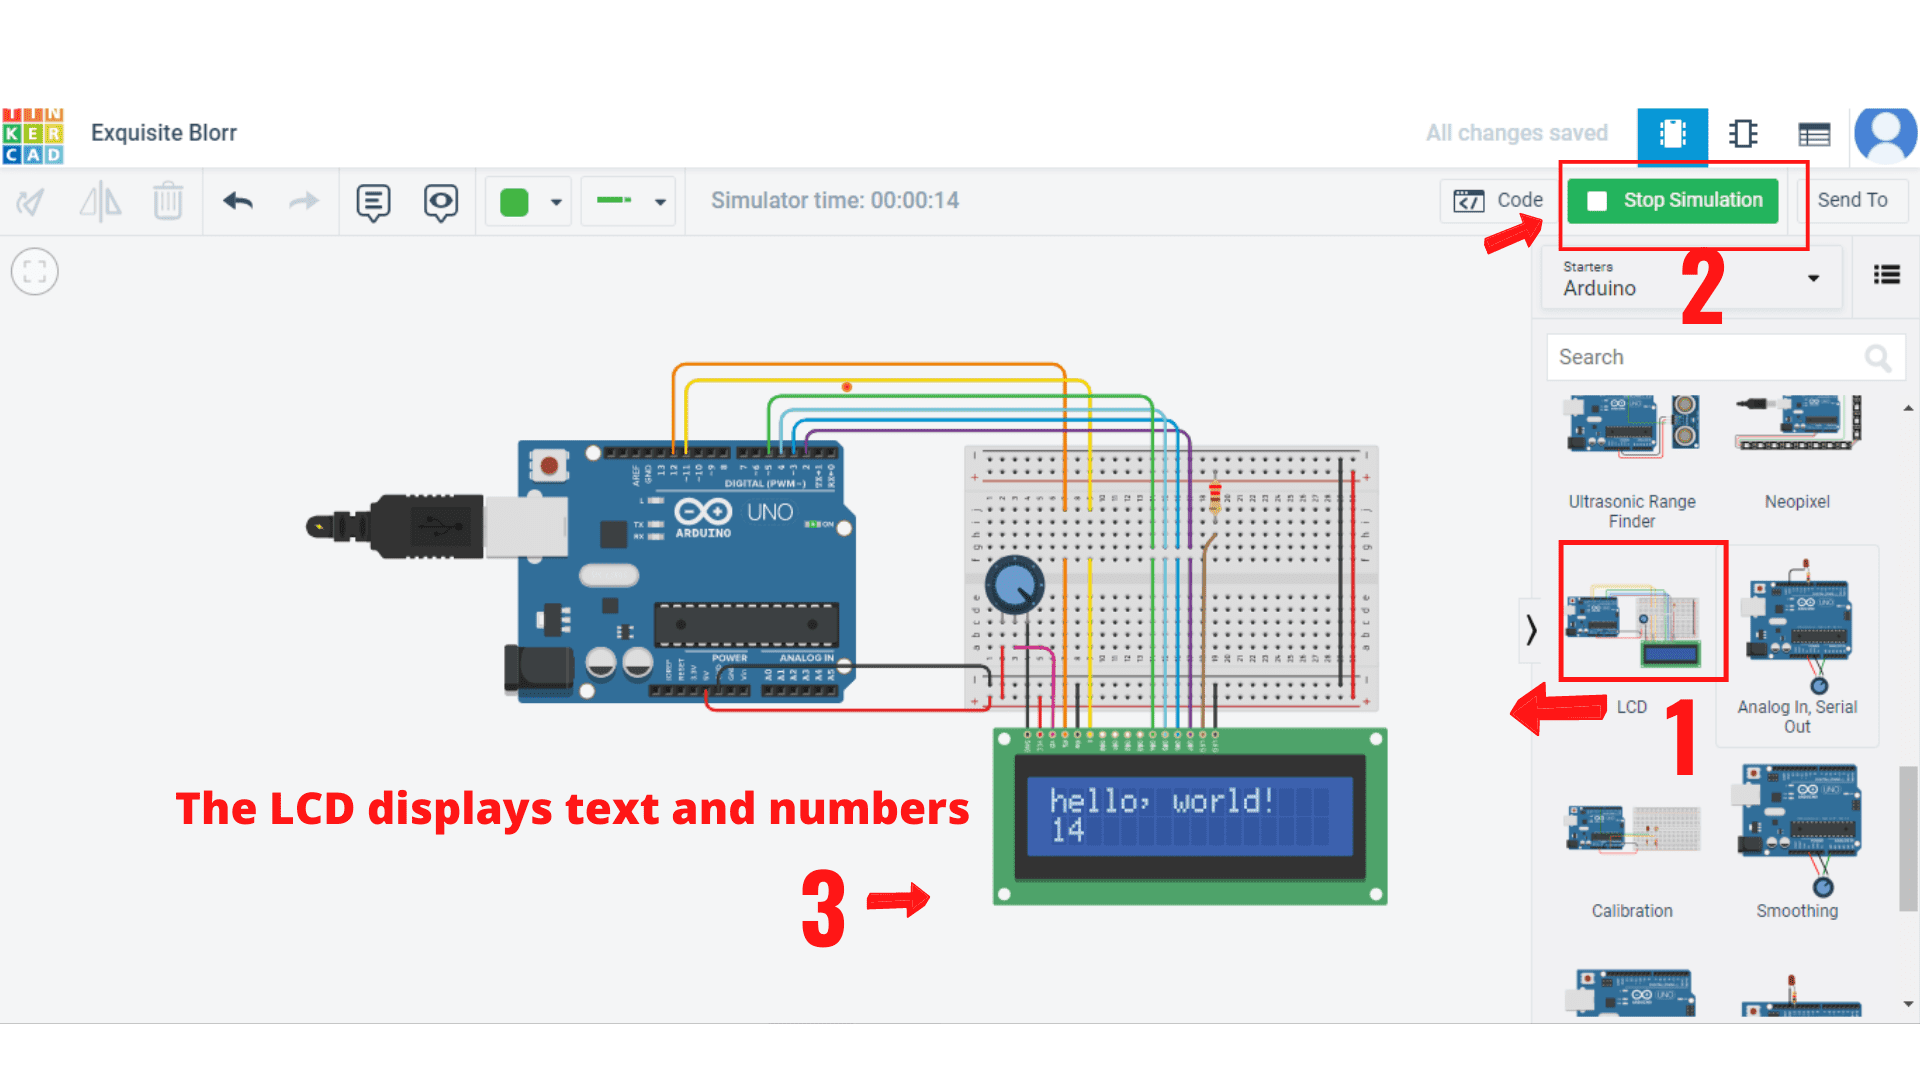
This project uses the LCD display to display text and numbers, while the Arduino Uno handles all the other tasks like turning on and off the power supply, displaying text, or sending data via serial port.
The project uses the Tinkercad simulator.
